itp: networks

[ITP: Understanding Networks] Semester Reflection

Sadly, Tom’s “Understanding Networks” class is coming to a close. I looked over my notes from the semester and here are my key takeaways:

  • In tech vulnerability is a weakness but in art vulnerability is valuable

  • The internet is PUBLIC space

    • I’m anti- smart-ifying the unnecessary

On the technical side:

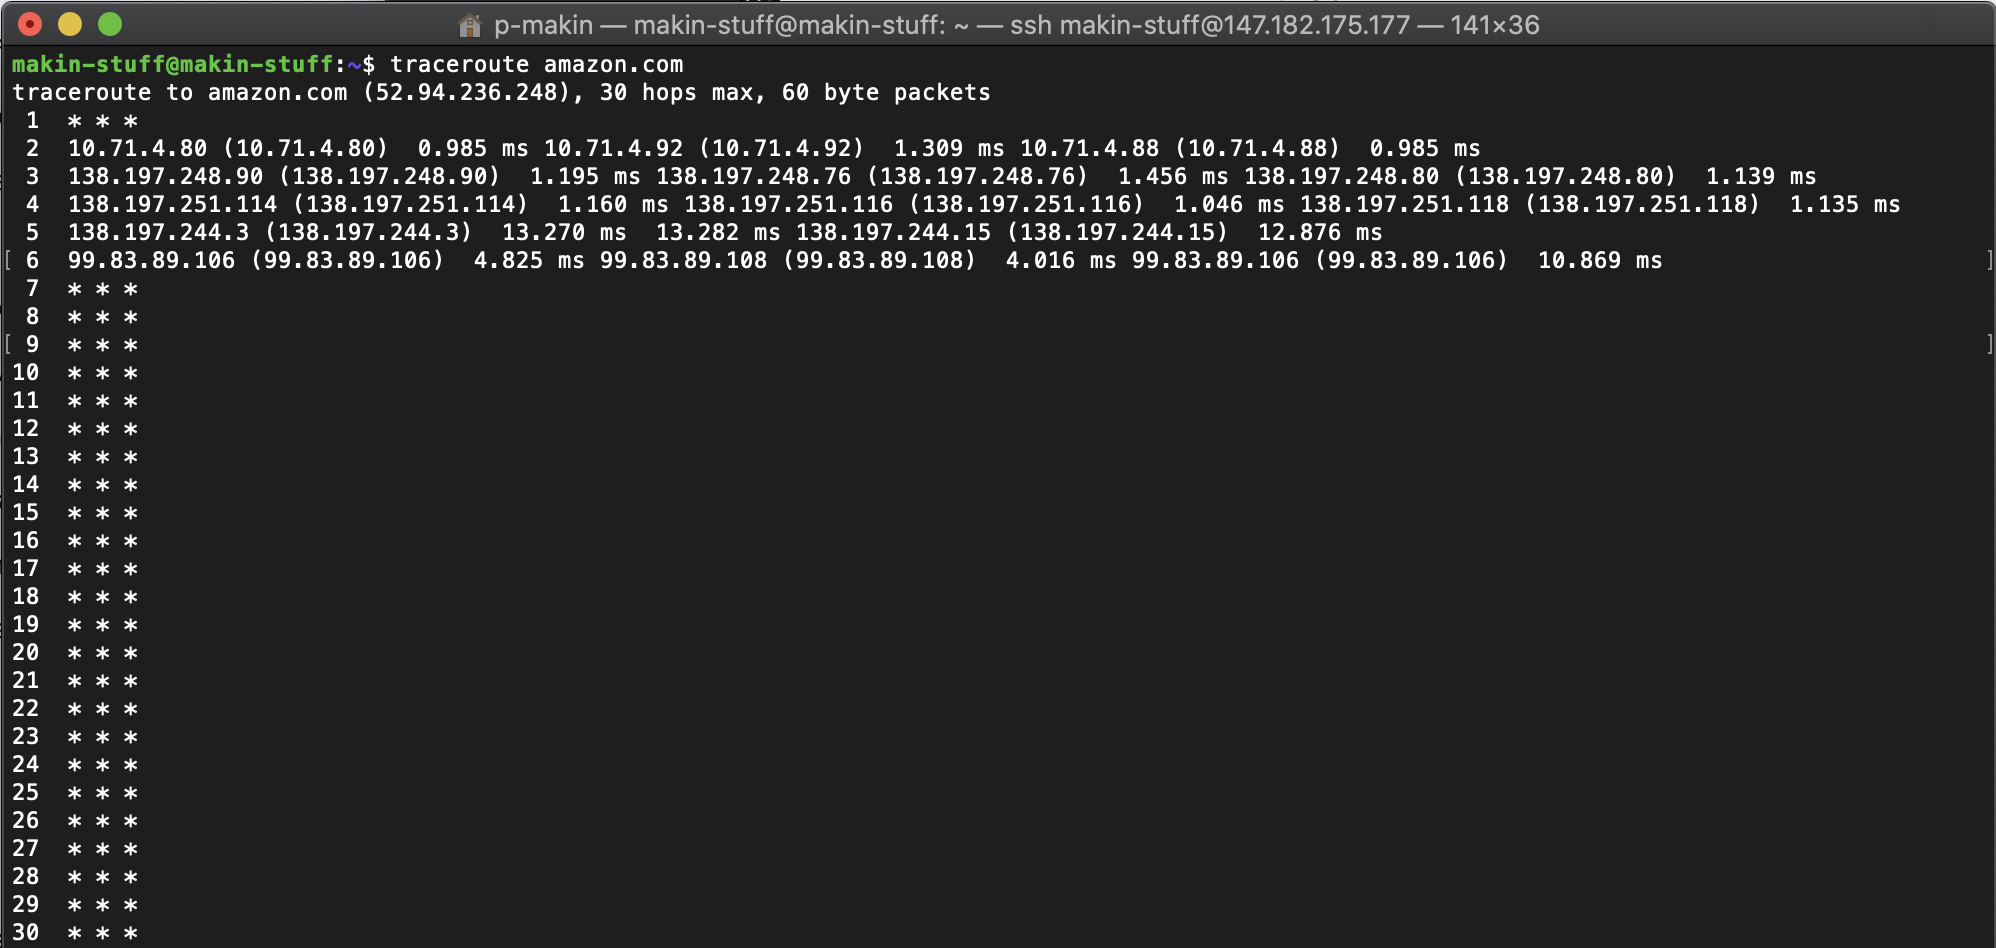
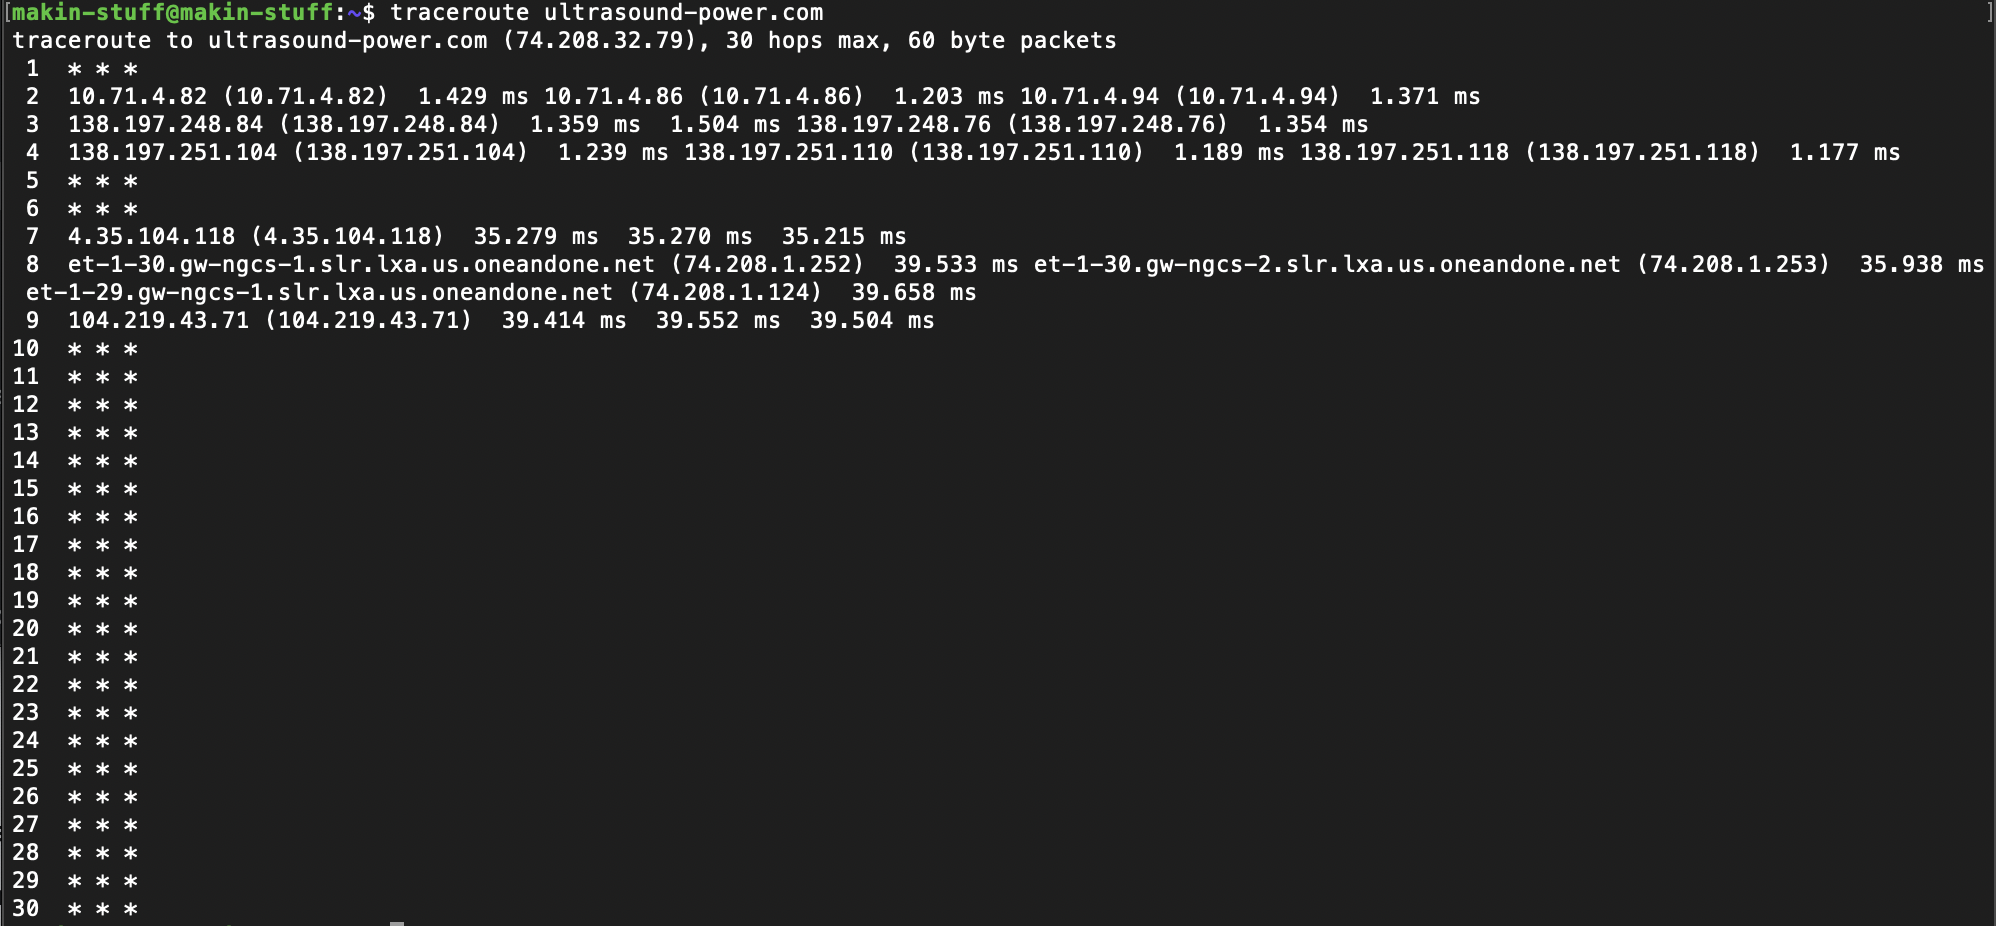
  • The client makes the request, the server responds to the request

  • Open System Interconnections model (layers of the internet?!)

Application HTTP
Presentation Unicode
Session ICP
Transport TCP / UDP
Network IP
Data Link WiFi / GSM
Physical WiFi / GSM

Left over questions and concerns:

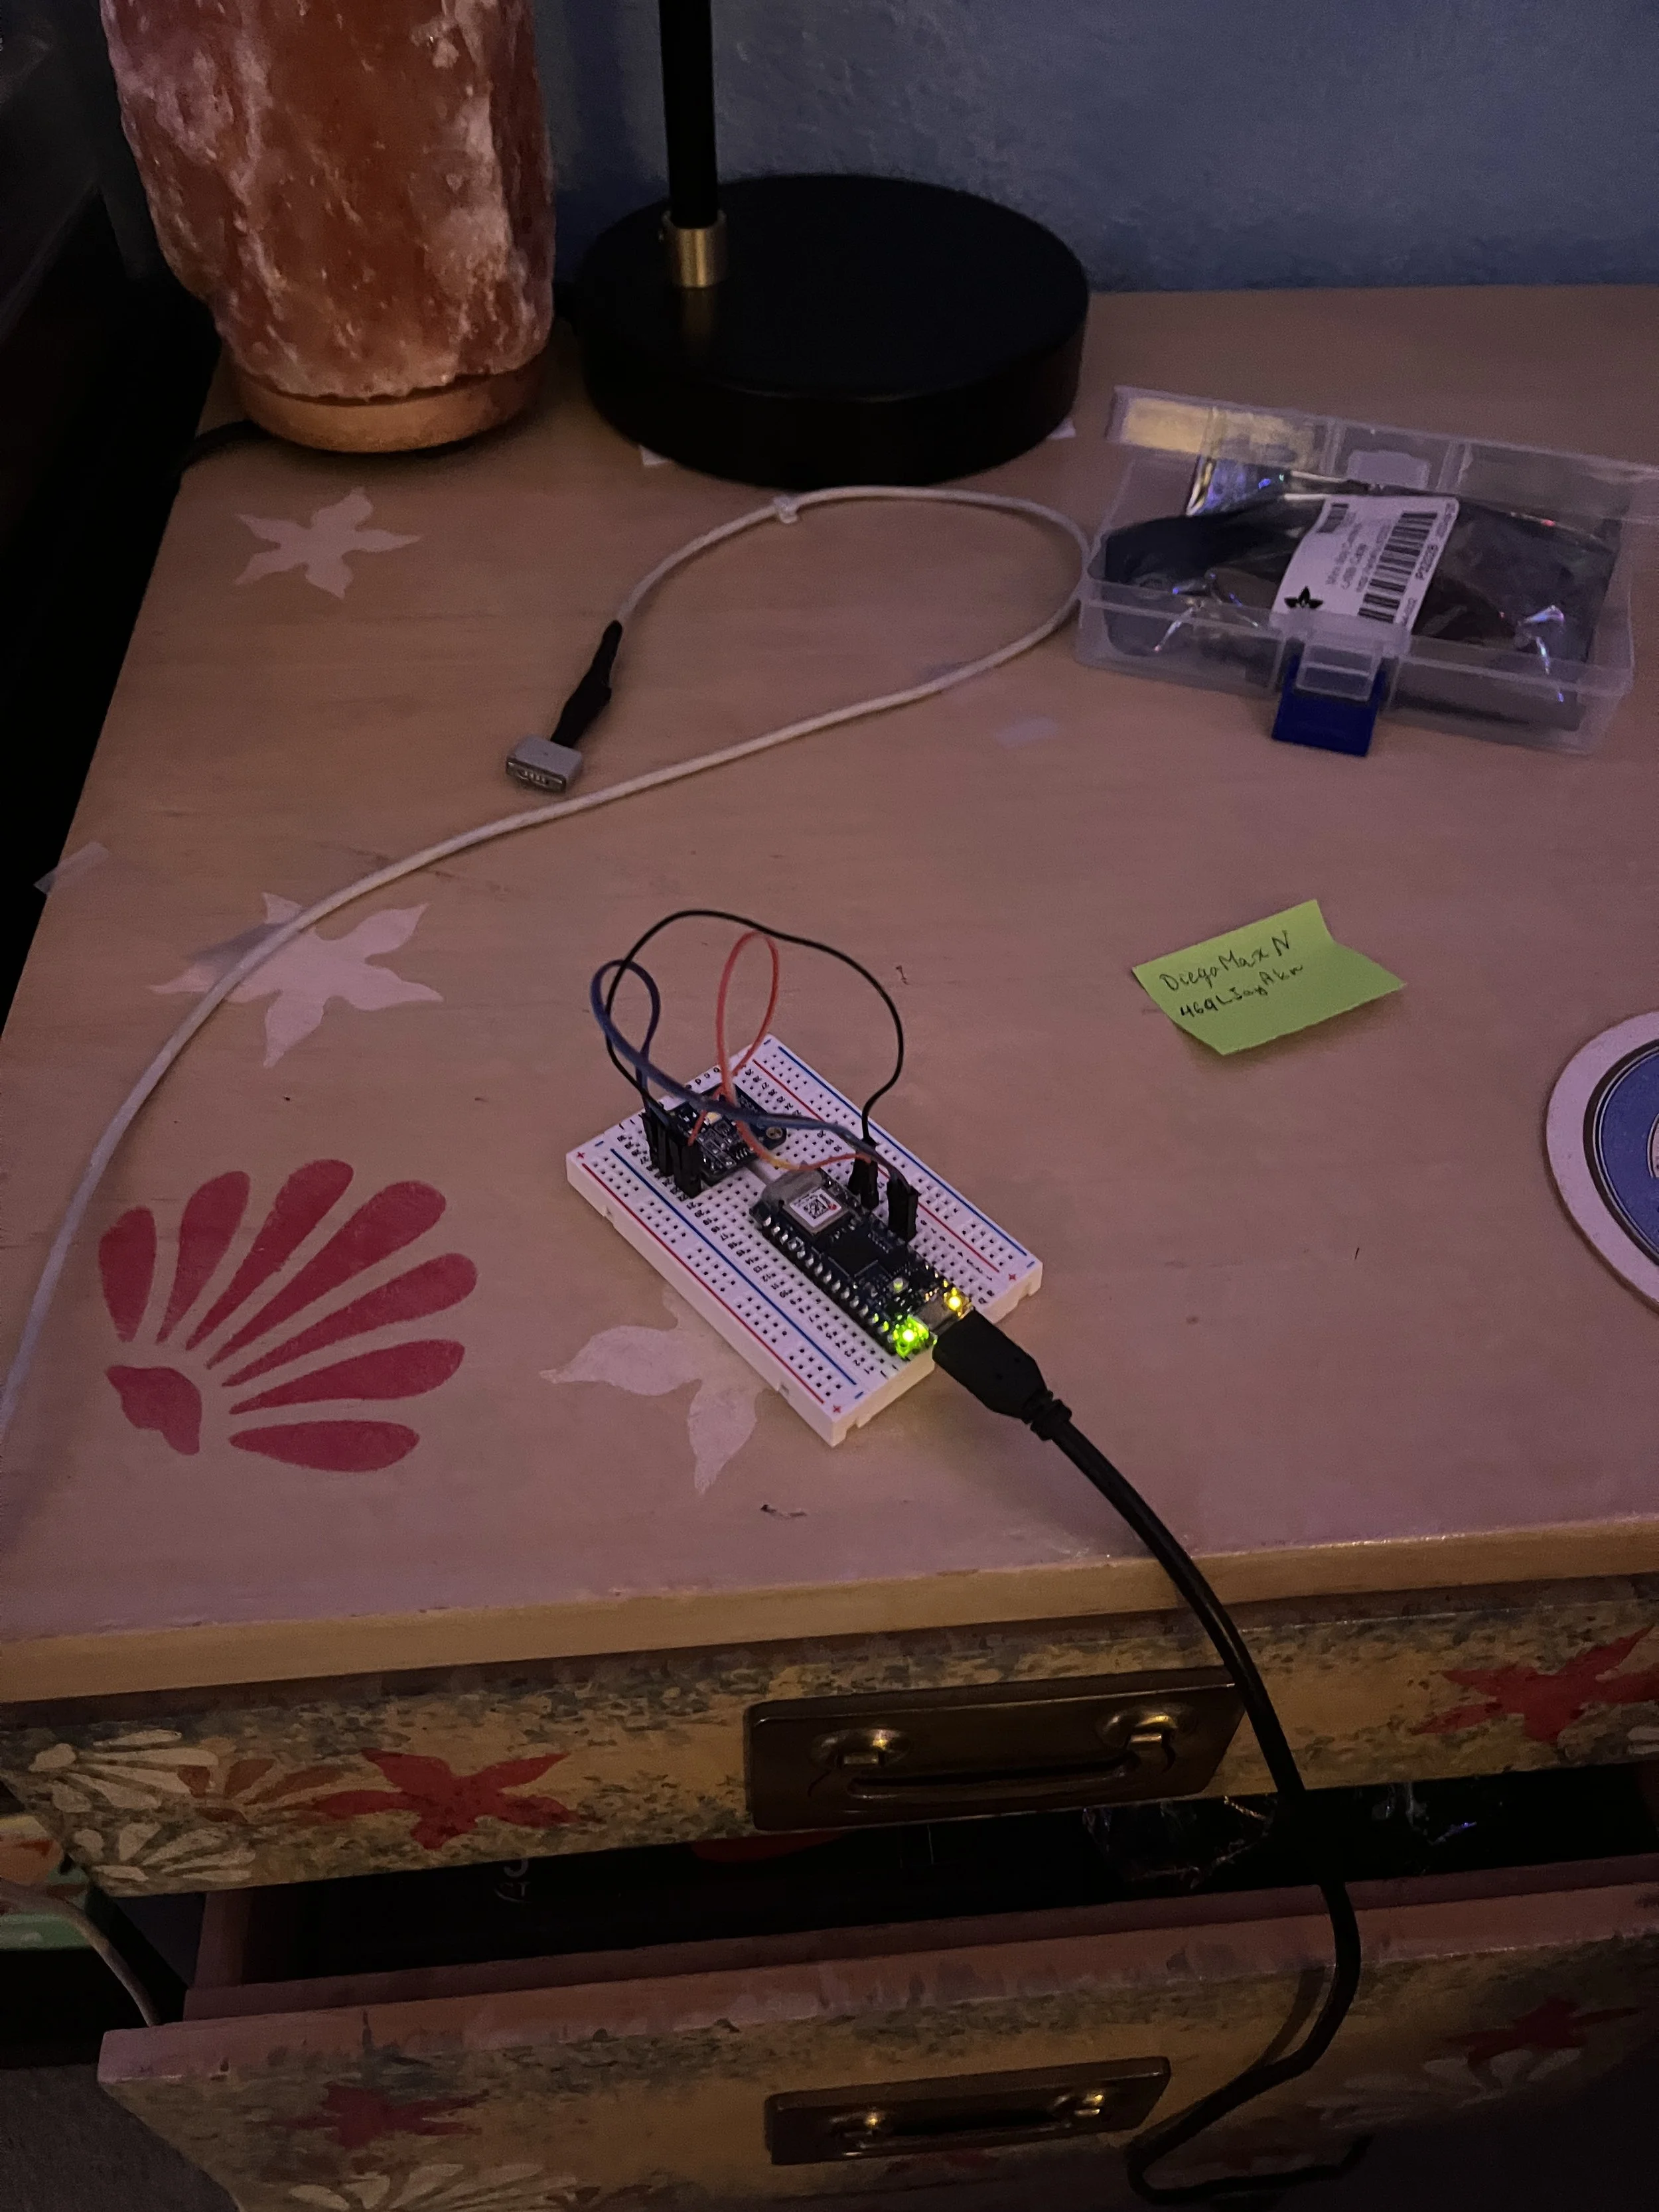
  • What projects can I build with what I learned in class? I want to learn to collect my own MQTT data and do something with it!

  • What are the implications of networks as large as the internet? Can it be accessible to all? And if not, to whom?

  • What data gets prioritized on the internet? What information can we be certain is true? What happens to our data?

  • What is digital colonialism and can net neutrality actually be achieved?

  • If we are unhappy with how the internet currently works, who has the power to change it?

  • What takes more energy: networks based on cables or networks sustained by satellites? Which impacts the world more negatively?

[ITP: Understanding Networks] Definitions

Evil bit - a fictional IPv4 packet header field proposed to a Request for Comments (RFC) publication for April Fool’s in 2003. The RFC recommended that the last unused bit, the “Reserved bit” in the IPv4 packet header be used to indicate whether a packet had been sent with malicious intent, thus simplifying internet security.

The RFC states that benign packets will have this bit set to 0; those that are used for an attack will have the bit set to 1. Firewalls must drop all inbound packets that have the evil bit set and packets with the evil bit off must not be dropped. The RFC also suggests how to set the evil bit in different scenarios:

  • Attack applications may use a suitable API to request that the bit be set.

  • Packet header fragments that are dangerous must have the evil bit set.

    • If a packet with the evil bit set is fragmented by a router and the fragments themselves are not dangerous, the evil bit can be cleared in the fragments but reset in the reassembled packet.

  • Applications that hand-craft their own packets that are part of an attack must set the evil bit.

  • Hosts inside the firewall must not set the evil bit on any packets. (RFC 3514)

Packet header - Data sent over computer networks, such as the internet, is divided into packets. A packet header is a “label” which provides information about the packet’s contents, origin, and destination. Network packets include a header so that the device that receives them knows where the packets come from, what they are for, and how to process them.

Packets actually have more than one header and each header is used in a different part of the networking process. Packet headers are attached by certain types of networking protocols. At a minimum, most packets that traverse the internet will include a Transmission Control Protocol (TCP) header and an Internet Protocol (IP) header.

For example, the IPv4 packet header consists of 20 bytes of data that are divided into the following fields:

Checksum - a small-sized block of data derived from another block of digital data for the purpose of detecting errors that may have been introduced during its transmission or storage. Checksums are often used to verify data integrity but are not relied upon to verify data authenticity. A good checksum algorithm usually outputs a significantly different value for even small changes made to the input. If the computed checksum for the current data input matches a stored value of a previously computed checksum, there is a very high probability that the data has not been accidentally altered or corrupted.

An inconsistent checksum number can be caused by an interruption in the network connection, storage or space issues, a corrupted disk or file, or a third party interfering with data transfer.

Programmers can use cryptographic hash functions like SHA-0, SHA-1, SHA-2, and MD5 to generate checksum values. Common protocols used to determine checksum numbers are TCP and UDP. As an example, the UDP checksum algorithm works like this:

  1. Divides the data into 16-bit chunks

  2. Add the chunks together

  3. Any carry that is generated is added back to the sum

  4. Perform the 1’s complement of the sum

  5. Put that value in the checksum field of the UDP segement

Resources

https://en.wikipedia.org/wiki/Evil_bit

https://www.cloudflare.com/learning/network-layer/what-is-a-packet/

https://erg.abdn.ac.uk/users/gorry/course/inet-pages/ip-packet.html

https://en.wikipedia.org/wiki/Checksum

https://www.techtarget.com/searchsecurity/definition/checksum

https://www.educative.io/answers/how-does-checksum-work

[ITP: Understanding Networks] Packet Analysis

Packet analysis

I downloaded Wireshark and captured traffic for 5 seconds with my computer as it is (running multiple Chrome browsers, iMessage, Spotify, terminal, and Wireshark of course). Packets were captured using the following protocols: UDP, TLSv1.2, TCP, DNS, and TLSv1.3.

I tried to find out where some packets were coming from by searching repeated IP addresses using ipinfo.io.

One source address that I think is responsible for the most packet data is 192.168.1.8. Wireshark shows port 443 as source which is https communication. Ipinfo shows this source is a bogon which is a bogus IP address that falls into a range of addresses that hasn’t been assigned to an entity by the IANA.

Amazon packet traffic. I guess that makes sense, Jeff Bezos is always watching…

This must be google chrome, right?

Now I’m going to repeat this process but close ALL MY RUNNING PROGRAMS😨(except Wireshark). The packet traffic was much slower this time around so I captured data for about a minute.

This time I saw additional protocols I didn’t see last time: ARP and TLSv1.2. It also seems like an apple device is communicating with the network… it’s 192.168.1.8! Not really sure what that means.

Again, I made note of some repeated IP addresses and they were both associated with Amazon as well.

Testing my browser

I used coveryourtracks.eff.org to see how trackers view my browser. This info can be gathered from web headers included in my device’s network requests or using JavaScript code. Here’s just some info my browser is giving away:

  • Time zone

  • Screen size and color depth

  • System fonts

  • Whether cookies are enabled

  • Language

  • What type of computer I’m using

  • The number of CPU cores of my machine

  • The amount of memory of my machine

At least my browsers fingerprint appears to be unique, whatever that means! It conveys 17.53 bits of identifying information, but I’m not sure how you can identify only a portion of a bit.

Testing my websites

Project Blacklight is a Real-Time Website Privacy Inspector. It can reveal the specific user-tracking technologies on a site (Blacklight). Let’s start by trying it out with the site I’ve been working on for this class: priyankais.online.

This is a relief, right? Because I’ve been developing this site from the ground up over the course of this class and we didn’t put any ad trackers in place!

Now let’s try this site, priyankamakin.com, which is hosted by Squarespace.

Hmm… not really sure why my site is sending data to Adobe. At first I remembered that I’ve probably linked to different Adobe products in my blog posts but I realized that is not the same as what Blacklight is looking for. I’m personally not using the Audience Manager or Advertising Cloud products above but maybe Squarespace is?

Let’s see if we can find something a little bit more interesting! I don’t really find myself browsing the internet for leisure anymore, I’m usually doing homework or streaming tv. I know my dad’s doom scrolling on npr a lot, so is a news source mining its anxious readers for their data? The answer is: hell yES.

Among the long list of companies Blacklight found npr.org interacted with, there are some I’ve never heard of and their names put a weird feeling in my stomach: comScore, IPONWEB, Lotame, or Neustar. Who are these companies and why do they care about me (or my dad)?

Resources

https://coveryourtracks.eff.org/

https://themarkup.org/series/blacklight

https://www.youtube.com/watch?v=OU-A2EmVrKQ&t=13s

[ITP: Understanding Networks] MQTT Client

I feel like I’m a week behind in this class because I’ve had 1 credit weekend classes over the last two weekends. Admittedly, I also ordered my sensor a bit too late, so I’ll try to send a few more days worth of data collection over Thanksgiving when I’m home in AZ.

What is MQTT?

MQTT is the standard for IoT messaging. It is designed as an extremely lightweight publish/subscribe transport that is ideal for connecting remote devices with a small code footprint and minimal network bandwidth. (https://mqtt.org/)

Get RGB Color Sensor Working with Arduino

I wanted to harness my inner Tom Igoe, so I ordered the TCS34725 RGB Sensor from Adafruit. I soldered on the included headers so that I could attach it to my bread board and connected it to my Arduino Nano 33 IoT using some jumper wires. In the Arduino IDE, I installed the Adafruit TCS34725 Arduino library and uploaded the “tcs34725.ino” example sketch.

Send Sensor Data over MQTT

Now that I’ve got my sensor working consistently, I can try to connect to the network. I started with the “MqttClientSender.ino” example. To be sure I’m sending my data to the correct place, I made the broker “test.mosquitto.org”, the topic “undnet/makin-stuff”, and the client “makinClient”.

To get my sensor data to send, I made sure to include the Adafruit library, create an instance of the Adafruit_TCS34725 object, and call it’s begin() function in setup(). In loop() I use the library functions to get lux and color temperature data from the sensor. I had to format the data in JSON to send over the MQTT client.

One cool tip I stole from Suraj is using the built in LED of the Arduino to indicate whether I’m still connected to the broker or not. Thanks Suraj!

Now that things are working I can check that it’s logging data using MQTT Explorer. Haha, there I am!

I let the sketch run for some time and periodically checked in on the debug statements. After about an hour or so I saw these error messages in the IDE and my built in LED turned off indicating that I lost connection to the broker.

I was also unable to connect to my land lady’s network at home. I figured I would try again when I got to my parents house for fall break and I wasn’t able to connect to their network as well which was super concerning. I tried out the “ScanNetworks” sketch from the WiFiNINA library and saw that the signal strength of my parents network was very poor (~-80dBm). I had glued down my antenna too good! I carefully removed some hot glue with a razor blade and more networks became available to my Arduino. It seems really straightforward, but it was also really satisfying to see the signal strength go up as I brought my Arduino closer to the router. Fingers crossed, I think removing the glue fixed my connectivity issues!

Setting up my Microservice

So I’m starting with Tom’s “MqttNodeClientFileWriter” example. I edited the client.js to fit my MQTT client by updating the “clientId” and “myTopic” variables to match my Arduino sketch. I also made sure the broker was the same, test.mosquitto.org. I also copied the package.json, package-lock.json, and an empty data.txt file to my folder because I figured it would be important. I pushed all this to github so that I could pull on my Digital Ocean host.

I cloned my repo on my Digital Ocean host, but I guess the linux terminal does not like spaces in names! Had to put an underscore in “Understanding_Networks” part of my repository’s name.

I made a copy of the folder on the home directory and installed dependencies with “npm install package.json”.

When I run the script in its directory with “node client.js” my Arduino seems to disconnect from the broker. It reconnects when I quit running my script. Super weird!

For now, I’m putting this exploration on pause. I thought it would be interesting to access the MQTT sensor data myself and do something with it. It’s not required for the assignment, so I’ll revisit this once I complete all the other assignments!

(Semi) Permanent Setup

Helpful Terminal Commands

“cd ../” = go up a directory

“sudo git pull” = to pull the latest from a github repository

“sudo rm -r [directory]” = remove a folder and all its contents

“cp -R [path to directory that’s being copied] [path to where you want your directory copied to]” = copy + paste

References

https://learn.adafruit.com/adafruit-color-sensors/overview

https://docs.arduino.cc/hardware/nano-33-iot

https://tigoe.github.io/mqtt-examples/

https://github.com/tigoe/mqtt-examples

https://github.com/makin-stuff/ITP/tree/main/Understanding_Networks/MQTT

https://www.screenbeam.com/wifihelp/wifibooster/wi-fi-signal-strength-what-is-a-good-signal/

[ITP: Understanding Networks] Cute Game Controller Update

This is a continuation of my previous blog post. In this article I will show you how I finished up development for my game controller.

I need my Arduino for the next assignment regarding exploring MQTT communication so I’ve got to wrap up my networked controller! I was getting pretty unreliable readings from the encoders in my game controller and I also wasn’t exactly sure if I could see it working in the in-class game play demo’s, so here I am testing it out.

Update code with new rotary encoder library

Tom Igoe let me know that the encoder library I was using doesn’t work really well with the Arduino Nano 33 IoT. I re-wrote my code using this library. The updated code is v2.0 in this repo.

Get Ball Drop Game working on my computer

When getting the game up and running I referenced Tom’s documentation quite frequently. I downloaded his repo and ran the game locally by running the Mac OS application in the BallDropServer folder. To connect to the game you have to be sure that the Arduino is connected to the same network as the machine running the game by updating the “arduino_secrets.h” file. In my case, that’s the experimental network “sandbox370” here at ITP. Also be sure to update the “server” variable in the Arduino code to match the IP address of the Ball Drop Game Server as shown below. And voila! The game controller is networked!

Final Product

Issues

I’m really happy that I got my controller up and running consistently. The button connection was unreliable so I had to glue it into place even though I wanted to have the option to detach the top of the lid from the circuit.

Also, sometimes while playing the game the communication lags so the paddle doesn’t move all that smoothly. Before realizing this I thought there might still be something wrong with my controller. And, I think the game play doesn’t work with long continuous movements that well. It seems like the paddle position is only updated once the server has stopped reading messages or something. But short quick movements (turns of the encoders) seems to make the paddle movement respond really well.

Resources

https://itp.nyu.edu/physcomp/labs/lab-using-a-rotary-encoder/

https://tigoe.github.io/BallDropGame/

[ITP: Understanding Networks] RESTful Microservices

Background

Web services or microservices are used to refer to parts of a website that are run by scripting tools or languages like node.js. The proxy_pass directive in Nginx lets you configure Nginx to expose your web application to the world while keeping privacy control. If a node script is listening on port 8080, for example, Nginx handles the HTTPS requests and passes them by proxy to your script on 8080. The server runs a Node.js application managed by PM2 and provide users with secure access to the application through an Nginx reverse proxy.

Build a “hello world” server

Start by downloading node.js and the npm package manager and install the build-essential package. This screen shot shows two terminals running at the same time. The first is running the “hello.js” node script. The second terminal window is connecting to the localhost at port 3000 using the “curl” function. It got a “Hello World!” statement in response from the node script.


Next, I installed PM2 which is a process manager for node.js applications. This manager makes it possible to daemonize applications so that they will run in the background as a service. Applications that are running under PM2 will be restarted automatically if the application crashes or is killed. Below is the output from PM2 which shows that my “hello.js” script is currently running.

I also created a systemd unit that runs pm2 for your user on boot which will run my “hello.js” script whenever my host is running.

Now that my application is running on localhost, I setup reverse proxy server so that it can be accessed from my site. Accessing my url via a web browser will send the request to my hello.js file listening on port 3000 at localhost.

Success! Working node.js application!

Setup location blocks

I can add additional location blocks to the same server block to provide access to other applications on the same server! By modifying the “sites-available” file for priyankais.online like this makes it so that I can access the hello.js script from priyankais.online/hello.

Getting Tom’s NodeExamples running

Start by “cd”-ing into the NodeExamples directory on the host and run a “sudo git pull” to update the local files. I’m going to be working with the getPost.js example in the “ExpressIntro” folder. Repeat the same steps from the section above:

1. Navigate into that directory and “sudo npm install package.json”

3. Set up the microservice to automatically run on boot using PM2

2. Run the server by typing “node getPost.js” which should return with “server is listening on port 8080”. In another terminal window type “curl http://localhost:8080” which prints out the html of the page I think.

4. Setup the reverse proxy server within Nginx

5. And here it is working! priyankais.online/data but I’m not exactly sure how it is supposed to work.

I found this helpful site that describes URL search parameters and so I figured out how to use the getPost script. In the search bar you can type something like this: “https://priyankais.online/data?name=prinki&age=69” and the html will update according to our script.

Create a custom microservice for my site

Now that I know how the getPost.js script works, I’m going to edit it to do something … interesting?! To me? Using Tuan’s code as a reference, I updated the script to take parameters from the URL and create a response.

Below is my updated getPost.js script. I’ve also uploaded it github. You can reach it at priyankais.online/initiation.

Questions / Definitions

Sometimes I need to restart my application using pm2, why is that? I thought we configured it to always be running…

Express.js = a library that simplifies the making of RESTful interfaces

Curl = a command line tool that developers use to transfer data to and from a server. At the most fundamental, cURL lets you talk to a server by specifying the location (in the form of a URL) and the data you want to send.

Resources

https://itp.nyu.edu/networks/setting-up-restful-web-services-with-nginx/

https://adamtheautomator.com/nginx-proxypass/

https://www.digitalocean.com/community/tutorials/how-to-set-up-a-node-js-application-for-production-on-ubuntu-20-04

https://developer.ibm.com/articles/what-is-curl-command/

https://flaviocopes.com/urlsearchparams/

https://github.com/tuantinghuang/und-net-F22/blob/main/simple-node/server.js

[ITP: Understanding Networks] Setting up node.js

I was able to secure Nginx using Let’s Encrypt last week. The process is documented in my last post.

Node.js

Node.js is a programming language that runs javascript on the command line. You can use node.js to write servers. Install it by typing “sudo apt install nodejs”.

I also installed git and the node examples from Professor Igoe’s github repo. I imagine they’ll be helpful in the future!

Field Trip Notes: 325 Hudson - Carrier Hotel

It has long been on my to-do list to add my notes from the field trip on 10/4 to my blog. Since this was a short assignment, I can organize some of my fractured thoughts here!

  • Design facilities for physical layer access

    • A space for new cables to come in

    • Real estate / rent for duct access

  • Interexchange provider

  • NETWORK neutrality, not internet neutrality

  • No construction needed to expand the network, room for expansion

  • The city owns the streets and what’s underneath them

  • POE = layer 0, holes to access the fibre

  • Carrier hotel = heart of the internet

  • Meet-me room = telecommunications companies can physically connect with each other and exchange data

    • Rack unit (RU) = 1.75 inches

    • Optical time-domain reflectometer (ODTR), light reader

    • Third party neutral arbiter

[ITP: Understanding Networks] Setting up Nginx Web Server

What is Nginx?

Nginx is a popular web server that hosts many high-traffic sites on the internet.

Process

Setting up the Nginx Server

I am following this tutorial from Digital Ocean to set up my Nginx server. First, I updated the “apt” packaging system and then “sudo apt install nginx”. For some reason I am still running into this error and am not sure why because I’ve definitely rebooted my Droplet.

Next, I needed to adjust the firewall and luckily Nginx registers itself with ufw (uncomplicated firewall) upon installation. The instructions for this assignment said to configure our server for both HTTP and HTTPS requests so that would mean opening up both port 80 and 443.

Looks like Nginx is running!

Here are some basic Nginx commands I tried out.

Setting up server blocks

Server blocks can be used to encapsulate configuration details and host more than one domain from a single server. The directory “/var/www/html” is enabled by default to serve documents.

I followed the tutorial to create the “your_domain” directory, configure permissions, and create a starter html page. I created a new default configuration file in the “/etc/nginx/sites-available/your_domain”.

Basic html page

Configuration file

If you look closely at my configuration file above, you can see I had a typo! This caused the Nginx test to fail. The right image below shows the output of running the test after I’ve fixed my configuration file typo.

Failed Nginx test

Successful Nginx test

Here’s where I’m lost. Obviously “http://your_domain” is not a domain that I own or exists, so this whole “Setting up server blocks” section didn’t really get me anywhere. Do I need to get a new domain for this class/assignment? I own the domain “priyankamakin.com”, could I make a new page on that and point it to my virtual host? How would I do that? How would the two things know of each other?

So, what I ended up doing was editing the “index.html” file in “/var/www/html” and this is what the browser looks like when I put my host’s IP address into the web address bar.

Cave and get a domain

I ended up getting the custom domain “priyankais.online” from NameCheap for a whopping $1.66/year. The first image shows how I pointed the domain registrar to DigitalOcean name servers and the second image shows the DNS record on DigitalOcean

I removed the “your_domain” directory and redid the “set up server blocks” section with my brand new domain… and drum roll… priyankais.online. Woo hoo!


Let’s Encrypt

I followed this tutorial to set up TLS/SSL certificates.

TLS/SSL certificates are used to protect both the end user’s information while it’s in transfer, and to authenticate the website’s organization identity to ensure users are interacting with legitimate website owners. Let’s Encrypt is a certificate authority (CA) which makes it easy to install free TLS/SSL certificates. A software client called Certbot automates almost all of the required steps.

First, I installed CertBot and confirmed the Nginx configuration file server block was pointing to my new domain name. Then I verified that HTTPS was allowed through the firewall. I obtained an SSL certificate by typing the command “sudo certbot —nginx -d priyankais.online -d www.priyankais.online”.

Voila!

Terminal and Nginx Notes

  • There are two primary directories on the host: /var and /etc

  • The server block I just tried to set up lives in “/var/www/your_domain/html” and that’s where the web content is saved.

  • “ls” = lists the files in a given directory, “less” = shows a file’s contents on screen at a time, “nano” = command line text editor

[ITP: Understanding Networks] Game Controller Update

This is a continuation of my previous blog post. In this article I will show you how I made an enclosure for my game controller circuit.

Solder Fest

First, I soldered a small protoboard female headers so I could easily unplug the electrical components if needed. The brain of this controller is an Arduino Nano 33 IoT which I only have one of and costs $24, so I want to be able to remove it and use it in other projects. I also soldered stranded silicone wire to my two encoders and push button and heat shrinked the joints. The stranded wire does not work super well with the female sockets, the tips need to be tinned, but the wire itself is more flexible than solid core so it can be stuffed into a small enclosure!

Circuit Testing

I wired up my complete circuit and made sure it was still working like before.

Enclosure Building

Next was the fun part, flexing my fabrication muscles. I found this little candy tin on the ITP junk shelf and thought it would make the cutest little game controller. After I made sure all the electrical parts would actually fit in this tin, I got to work.

First, I drilled holes for the two encoders and the button to be mounted to the lid. I used tin snips to make an opening for the micro USB cable to connect to the Arduino.

The edges were kind of sharp. I cleaned them up using the small snips to cut away sharp pieces and taped up the edges of the USB hole so it wouldn’t cut anyone.

Next, I spray painted the top and bottom pieces in the basement spray booth.

I also cut this circle to line the inside of the tin. I’m not certain if the tin is conductive, but it’s a good safety measure to add some paper to mitigate shorting.

Installed paper liner.

Finishing Touches

I cut flower knobs using the laser cutter.

I glued together the wood layers with wood glue and painted some designs.

Final Product

Assembled controller - I screwed on the nuts of the encoders and button to attach them to the lid.

Installed electronics - I used some putty to keep my protoboard/circuit in place.

I ended up gluing the acrylic layer to the wood by using this glue called “GOOP” that I picked up from Bruno’s. I think it’s worked pretty well.

Conclusion

I’m really happy with how my controller turned out. One of my biggest downfalls as an engineer is that I didn’t grow up playing video games so I’m on the outside for a lot of nerdy conversations. This is my ideal, Priyanka-esque, hyper-feminine game controller.

Here are my next steps:

  • Try out the new encoder library. Try getting to the bottom of the inconsistent encoder readings.

  • Make sure I can play the game on my computer and get some footage of the controller in action.

Here’s a link to my final blog post on this project.

[ITP: Understanding Networks] Networked Game Controller

Background

This weekend I made a game controller for Tom Igoe’s ball drop game. The Arduino Nano 33 IoT board we got in our PComp kits includes a Nina W102 uBlox module which supports WiFi connectivity so it was a no-brainer that I would use that. I’ve never made a game controller before so I looked to past students blog’s for reference.

I loved the this example and the control interface Beverly Chou developed that I wanted to do something similar. It’s kinda surprising that I’ve never encountered rotary encoders with my background before so I was interested in learning how to use them for my controller.

Circuit

Even though all Arduino nano 33 IoT pins should have external interrupts, I could only get the second encoder to work on pins 8 and 9. At this point I am not sure why that is.

Process

First I wanted to make sure I could get my hardware set up working. I started by bread-boarding the encoders and testing their functionality with Serial.println()’s. The blue knob sends the commands that moves the paddle up (CW) and down (CCW). The yellow knob sends the commands that moves the paddle right (CW) and left (CCW). I also needed to add a button to connect and disconnect from the network but I quickly ran out of space on my small bread board. These encoders have a push button built in, so I connected the blue knob’s button to the Nano 33 to establish a connection to the network.

Next I needed to send the game commands over the network using a TCP socket. With some digging I found the WiFiNINA library and examples. Then I found that Professor Igoe already wrote the WiFi joystick client, so I guess it pays to read the instructions fully….

After this, finishing up the code was a breeze. I added in the print functions to the client where they needed to go. I did get this weird error on my first compilation but I got rid of it by just updating the Arduino SAMD boards package.

Code

You can find the code and it’s iterations here.

Trouble-shooting and Future Work

So far I’ve been getting kinda weird readings from the encoders. I think this is because the encoders don’t really sit in the bread board right. I’d like to solder wires to them and mount them onto an enclosure. I’ve ordered some protoboard and female headers to recreate this circuit to fit in an enclosure. I found a mint tin on the junk shelf at school but it might be too small.

I’m also not sure how get the game running and get my controller interfacing with it. I’m sure we’ll go over that in class!

Here’s a link to my next blog post working on this game controller.

Resources

https://store-usa.arduino.cc/products/arduino-nano-33-iot

https://www.sparkfun.com/news/2438

https://learn.adafruit.com/rotary-encoder/hardware

https://www.pjrc.com/teensy/td_libs_Encoder.html

https://tigoe.github.io/BallDropGame/

http://itp.fromjia.com/?p=440

https://itp.beverlychou.com/websocket-game-controller/

[ITP: Understanding Networks] Traceroute

Traceroute

Background

Traceroute is simple tool to show the pathway from a web address or computer on the local network to a remote server. It can be used to compile a complete route list, analyze route timing, check if you can reach a certain target, or diagnose slow routers or broken connections. Below I’ve posted the results from tracerouting some of my most frequented sites. I then put the traceroute output into a mapper to visualize the path.

In the terminal output, the asterisks (*) mean that there’s a problem with the route to the host. I’m not really sure why there are so many of them in some of the traceroute output.

East Coast Communications

Gmail (mail.google.com)

Spotify (spotify.com)

Youtube (youtube.com)

West Coast Communications

Digital Ocean (digitalocean.com)

Instagram (instagram.com)

What is going on on the corner of Broadway and Chambers St?!

Many of my traceroute queries ended up pointing to the same address in NYC (amazon.com, hulu.com, itp.nyu.edu, netflix.com, priyankamakin.com (squarespace site), sparkfun.com). Looking through the output, I couldn’t find one IP address that was common to all paths but it seems as tho all the routes have the following hops: 138.197.248.x, 138.197.251.x, and 138.197.244x. I am not quite sure what this means at the moment.

Here’s where it gets a bit more interesting!

My mom’s website (imakinations.com)

My dad’s website (gopiezo.com)

We’re going international! I called up my dad and he reminded me that his website was created and hosted by a company called SCAD media. According to him, they’ve got a location in Dresden, Germany. If you look closely at this map, the path doesn’t quite get there.

My dad’s OTHER website (ultrasound-power.com)

This site is also by SCAD media but the path is completely different. I am not sure why the two maps look so different.

Conclusion

It’s pretty helpful visualizing the traceroute output with the mapping tool. It helps me better understand how the wireless communication is happening. Looking through my output, I’m not sure I came across any autonomous systems (AS).

I did come across an error repeatedly. When I tried tracerouting sites like itp.nyu.edu/classes/undnet and instagram.com/priyankasomething the terminal responded with “Cannot handle “host” cmdline arg…”. I am not exactly sure why the traceroute tool does not work for more specified urls.

Firewall logs

I realized that last week I forgot to check my firewall logs after setting up my uncomplicated firewall. I did this activity today, so here’s a little summary.

Parsing through my ufw.log file I found out that there have been 4691 attempts to connect to my computer since I last turned it on. Using the “cat”, “grep” and “wc” (word count) applications I also saw that there were 109 attempts to connect from IP “89.248.165.108".

I was also able to use the “sed” command to replace spaces with commas in my log file and copied it into Google Sheets to be able to look at it a bit better.

Network Spotting

So these are some networks I spotted on my walk back from Little Italy to my apartment near Washington Park this weekend. It looks like the first picture of a manhole cover is labeled “BS”. Referencing Ingrid Burrington’s “Networks of New York”, I couldn’t find a description of that abbreviation, but a quick google search shows that “BS” stands for “Bureau of Sewers”, so not exactly an access point to the wireless network… But the next manhole cover is illustrated in her book: “Empire City Subway” which had the New York Telephone Company as a primary shareholder.

I also came across an NYPD security camera (“Networks of New York”, pg 94). The last two images are from a subway station and I think that’s the underground wireless network.

[ITP: Understanding Networks] Setting Up a Linux Host

I followed Professor Igoe’s articles on how to set up a virtual host and how to configure a firewall and here’s a quick recap on the process. First off, a virtual host is just a computer system attached to the internet.

Create Droplet

Digital Ocean is a platform for virtual hosting, so I started off by creating a new account by logging into my GitHub account. One thing I haven’t been successful with yet is setting up the student credits but I think I’m using some sort of other free trial which should work for now.

Each individual host is called a “Droplet”. So, in your Digital Ocean account choose “Droplet” from the side menu. Then hit the green “Create” button > “Droplets”. Next, configure your Droplet with the parameters shown below.

  • “Ubuntu” image

  • “Basic” plan

  • Cheapest subscription plan

  • No block storage

  • Pick NYC datacenter

  • Choose hostname and password

  • Create Droplet!

Using my “Terminal” program to log into my new virtual host!

Configure Droplet

Add Users

Next, I needed to setup a user. The first user on any POSIX host is called “root” but it is not advised to operate as the “root” user. Once the new user is created, you can use the “sudo” keyword to perform tasks as the superuser. So once the new user is created it needs to be added to the superusers group.

Update the operating system

Use the “apt” keyword (Advanced Package Tool) to update the Ubuntu operating system. Then, I used the “apt” command to install the Uncomplicated Firewall. A firewall sets the rules for what you device’s network interfaces should do with incoming or outgoing data packets.

I also installed other tools such as “network tools” and node.js which is a tool for server-side programming in JavaScript.

Configure Firewall

I followed the second article to setup my firewall. The first image shows how I enabled certain ports of my firewall to receive communications. The second image shows my setup Uncomplicated Firewall. Now my virtual host is up and running and protected by a firewall!

Loose Ends

One weird thing that I ran into a couple of times was this error message that my kernel was out of date. I did reboot my host, so maybe that fixed the issue?! I’ll keep an eye out for it in the future.